Monday, October 24, 2011

Marburger Farm Antique Show

Wow! It has been a busy, busy month for me. Thankfully, things are starting to settle down somewhat and I'm back to my blogging ways. A few weeks ago I had the great fortune to be able to attend the Marburger Farm Antique Show in Round Top, Texas. My husband was in Houston on business and Round Top is located about an hour from there so we made a trip of it. I was able to take my trusty sidekicks with me, my little guy and (thank goodness) my mom.


We decided (smartly enough) to reserve a golf cart for our day at Marburger which was well worth it. With temperatures in the high 90's and 43 acres to scour, the golf cart was our friend! Plus my little boy loved to "drive."


This was an antiquing experience like I've never seen before! Naively, we hit the road and figured once we hit Round Top we would know where the show was right away. When we got there, there were so many antique tents set up on the side of the road it was dizzying! According to about.com, during the biannual Marburger Antique Show, there are FIVE times as many antique vendors as there are town residents. Finally we decided to stop at the gas station and ask for directions. My mom came back to the car and said, "The woman told me we will know when we get close. Traffic will be at a standstill for a few miles." And sure enough it was. We finally got into the gates and entered antique heaven! An eclectic mix of granny's antiques, repurposed art, shabby and vintage finds, and even fabulous vintage clothing, this place has it all!

Of all hundreds of vendors at the show, two stood out as my absolute favorites. Alice & Jay had an amazing tent full of repurposed vintage and antique finds. What caught my eye was the front of their tent.


Gorgeous isn't it? These repurposed tubs are my favorite!

They also had an amazing collection of repurposed decor inside. Check out their lamps here. Using everything from chicken feeders to milk buckets, Alice and Jay have an awesome eye for great repurposing!

My other favorite shop was The Shop Antiques. Not only was the shop an overload of quirky, vintage carnival fun but the shop owner Mandi was amazing and knows her carnival stuff. This shop was even featured on American Pickers earlier this year!


I fell in love with this super fun carnival wheel that was already sold unfortunately. Mandi also informed me that the wheel was featured on Pickers. There was so much to look in this little shop. I truly wanted it all! I especially loved the old floating ducks that were used in carnival games. Check out The Shop's site here.

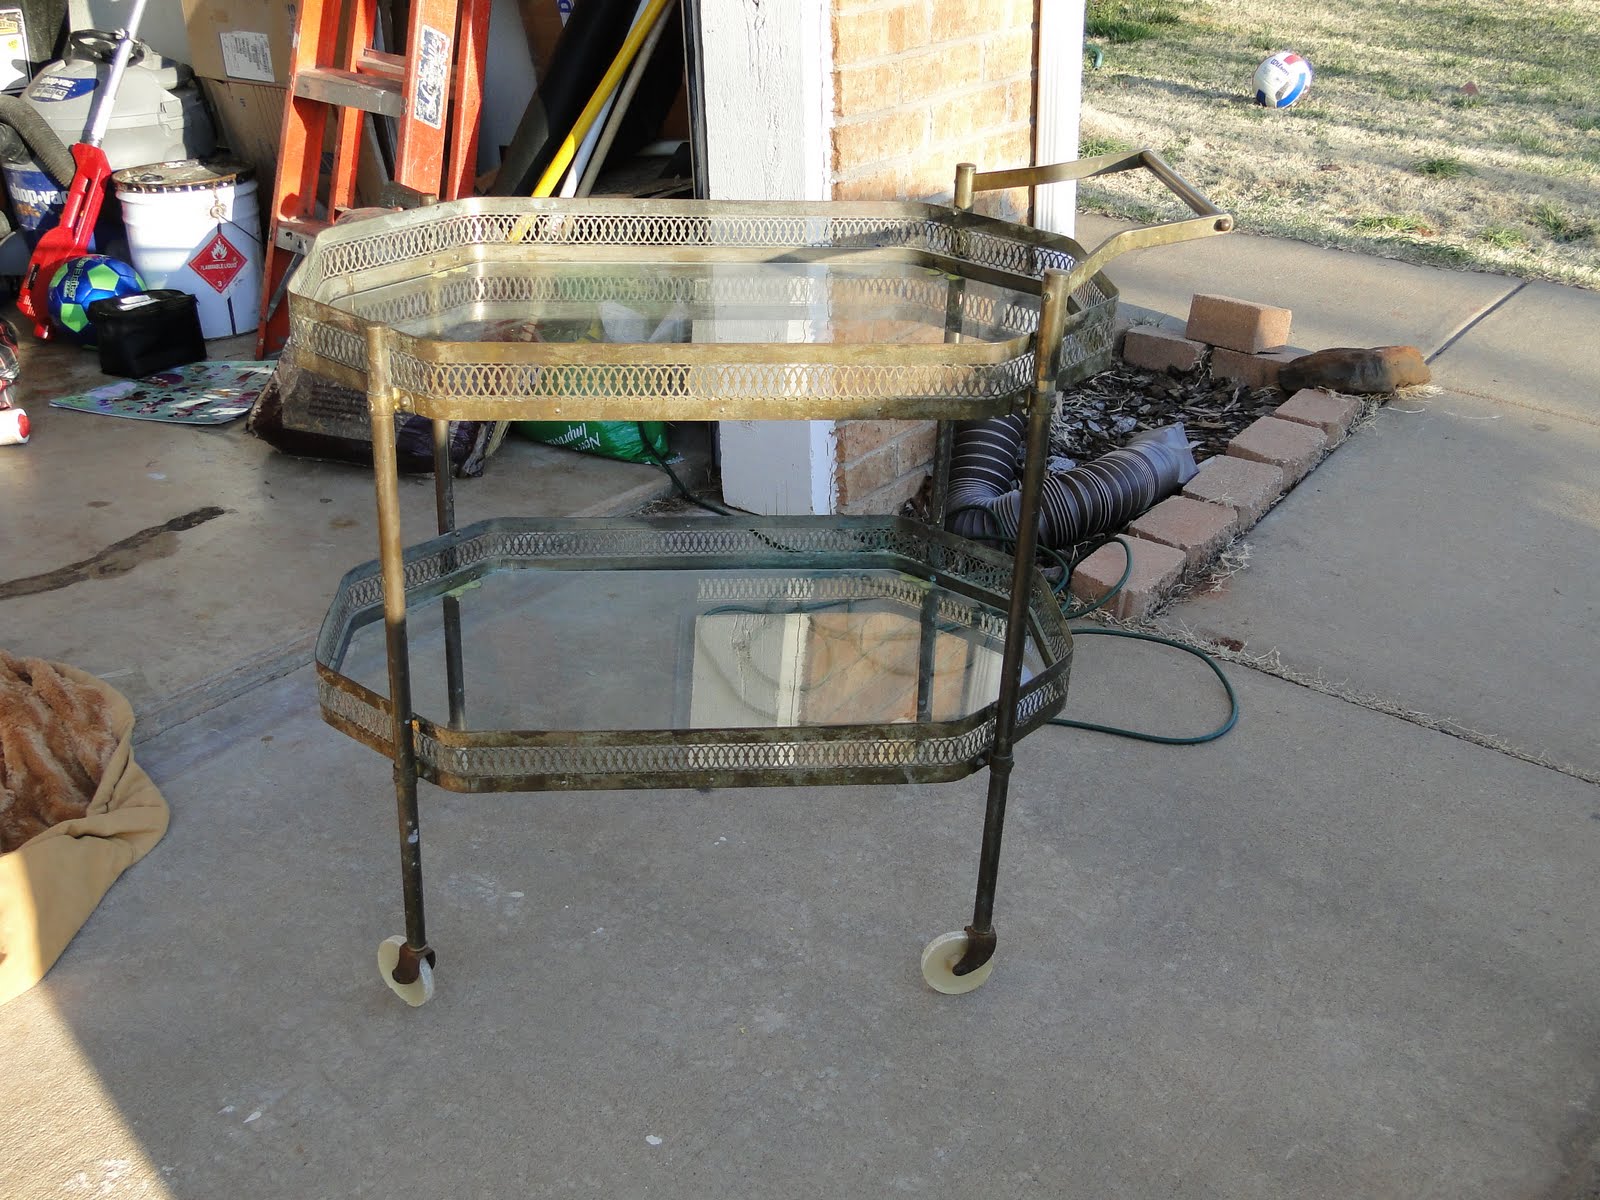
While Marburger was an absolute blast for me and my sidekicks, you definitely need to bring your pocketbooks! This isn't a flea market. It's a show where the vendors come from many different states, and they spend a lot of money to get there. They aren't giving their things away. They did the digging, cleaning, repurposing and they all have fabulous shops! However, even if you're a picker like me, it's fun to explore and maybe even pick up a treasure or two along the way like I did.


If and when you're ready to get down and dirty, bring your walking shoes and visit some of the hundreds of vendors outside of Marburger after the show. You'll find everything from flea market tents to high quality antiques outside of the gates of Marburger. This sleepy little town that turns into a bustling metropolis twice a year is definitely worth the trip and one I plan on attending time and time again!

Wednesday, September 14, 2011

QUIRKY: Upcycled Milk Crate Project

Browsing a recent estate sale, I stumbled on three vintage milk crates. Not the old, industrial, perfect for home decor awesome kind like this one from hilltopcottage.


No, these crates were straight up ugly... and I had to have them! Two dollars for all three? Sold to the sucker in the corner! But I had BIG plans for these uggos. The first thing I had to do was wash them off. Years of dirt, grime and spiders from the garage had taken a toll on these crates. So I gathered up my 19 month old partner and told him to get to work spraying (his favorite activity) those crates!


After removing the dirt and spider eggs, yes spider eggs... eew

I then spent about another hour with a bottle of 409 and some Q-Tips cleaning out the crevices wondering what the heck I had been thinking? If you want to get into some kind of similar project, you can just get the little cheapo crates from Wal-Mart or where ever. However, personally I like to upcycle and whenever possible I like to avoid giving my money to Wal-Mart. Besides, you can't get the crates that will allow you to chalkboard the middle unless you use the real, vintage deal. 

After all my scrubbing and cleaning, I then taped around the middle box on all the crates, where the company logo was. This is the section of the box you will use the chalk board spray paint. Chalk board spray paint is the coolest. I want to chalk board everything with it! BUT Since I don't want to be referred to as "Crazy Chalk Board Lady" I try to refrain and use chalk board spray paint sparingly. 

After two coats of chalk spray paint and a passing inspection from my beagle Bam, I then waited 24 hours to let the chalk board paint dry (after all you don't want the fresh coats to chip) then taped up that part and went to work painting the rest of the crates. I went with three different colors. All Krylon satin colors: Periwinkle, Jade, and Pistachio. Each crate took an entire can of the selected color and if I had really wanted to be a perfectionist about it, I could have used more than an entire can. I just skipped painting the underside of each crate. After letting the new paint day, they were ready for stacking. 


Baby boy is so proud


A quirky stack

The best part is the erasable chalk board paint in the middle, great for labeling. I have a simple 1, 2, 3. I'll probably end up with them in the kids playroom marked something like "legos' "markers" and such. 

Overall, I'm pretty happy with this project. They look great and it's something me and my little guy did together!

How about you? Any other upcyclers out there?

Sunday, September 4, 2011

My FIRST Etsy Front Page Experience

It's the Holy Grail of Etsy sellers.. or for me at least. I daydream about one of my items making it to Etsy's front page constantly... and it FINALLY happened today!

Unless you are an Etsy seller, it's difficult to appreciate all the hard work that goes into your shop. For us vintage sellers, it's hours upon hours of hunting, searching, scavenging, getting the deal, getting the stuff people want. Then you have to go home, clean and inspect your new treasure, take photos (not eBay style either, Etsy likes pretty and artsy photos). After that, you get to edit your photos. Finally you get to the dreaded listing process. I hate this part: add photos, make your items sound fabulous, rack your brain for the best tag words, try to optimize your listing for SEO. Ugh, it can seriously get exhausting. Then you pray for views and "hearts" (people that add your listing to their favorites). After all, it's nice to know that after all your hard work, someone appreciates it.

Being on the front page means, above all, EXPOSURE. When someone types www.etsy.com into their search bar the front page is what pops up. Someone that will probably never see your shop might see your item and think "Hey, that's pretty cool. I need to check it out!" For my shop, I usually average about 60 - 120 unique visitors to my shop per day according to www.craftopolis.com. My unique views today were over 450! That's by far a personal record for my little vintage shop. What fun it was to refresh my shop stats and see the views climb and climb.

Here is the treasury my item was featured in: My item is the beer stein, third row, far right.

I sold my stein to boot. If I never make the front page again, I think I can be happy with this one time. What a fun experience! A special thanks to mktengineer for featuring me in this lovely treasury! So, does anyone else have a front page experience... or do you think it's overrated?

Saturday, August 27, 2011

From Dull to Shabtabulous...

Awhile back I wrote a post about some recent finds. One of them was a great little vintage tea cart.
Quirky: Old Brass Tea Cart


I fell in love with the character of it. The white plastic wheels that keep on rolling, even with the chips and dents from age, the brass that was begging to be polished to a like-new state again, even the old lime green gooey substance that was used to mount the glass to the cart. 

A few trades later with the thrift store owner, I was loading this beauty up into the back of my SUV with visions of grandeur!

The first week home I did a little bit, cleaned the glass, scraped the goop, even polished a little. A very little. I'm talking maybe a 2" to 3" spot on the top railing. How long did this small feat take me? Oh somewhere in the vicinity of 30 minutes or so. 

My visions of grandeur were slowly fading as life got in the way. My little cart made its way into my room where it became a haven for toddler socks, my blow dryer and a few hastily arranged family photos. 

After months of this, I decided it was time to make my little cart fabulous, even if it wasn't the way I had once envisioned. I decided to (gasp!) paint it. For some reason, painting vintage items has a certain stigma to it for me. I know many people frown on painting a beautiful vintage wood piece, but this is brass right? The same metal that has to be polished and polished and then polished again!

So after a brief discussion in my brain, I decided to go for it. I had the perfect color in mind. I drove to Wal-Mart, picked out two cans of Krylon's "Pistachio" Spray Paint and went to town! After taping up the wheels and adding a coat of primer, I then added a few coats of the spray paint and wah lah, instant shabtabulousness!

Primed and ready to go


The finished product!


I sanded a little here and there for the shabby look

I love how the gold comes through all around the top 

I'm actually very pleased with the outcome. I figure I'll leave it this way for awhile and then maybe spray paint a few coats of another color over the Pistachio. Then I'll sand a little so the Pistachio shows through. Now, I just need to find an appropriate place to put it where it won't become a catch-all! Easier said than done :)
                                                  

Monday, August 22, 2011

Essential: Haggle Your Way to Victory!

Whether you are a seasoned picker or an every now and then garage saler, you can save some serious dough by honing in on your inner haggling skills. For some people, haggling just comes natural. I recently had a garage sale where a very young girl (around 5) haggled a five dollar item down to a dollar. When she walked away I thought to myself, "that smart little girl just used her cuteness to get a ridiculously good deal!" This brings me to lesson 1.

Lesson One: Know what you have and use it!

That adorable little girl knew what she had just as I know what I have. Let me introduce you to my secret weapon.


28 pounds of pure "melt your heart" power! This little guy has got me more free and ridiculously cheap stuff than you could imagine. If I walk up to pay for my goods and this little guy is holding something I say "Ah geez, he is just not going to put this thing down! How much would you sell it to me for?" Nine out of ten times they say, "You can just have it!" Score for me! Maybe you don't have a little one, but you have ridiculously long eyelashes you can flutter, or you're incredibly funny, or you're a great sweet talker. Learn what you have and use it!

Lesson Two: Kill 'Em with Kindness

If there is one thing I've learned after countless estate and garage sale haggling, it's this: talking down to someone or being rude won't get you anywhere. The last thing people want to hear is "This [fill in the blank] isn't worth near what you're asking!" Maybe to them it is. Maybe you're at a family run estate sale telling them a precious memento from their childhood isn't worth squat. 

Always be kind! Strike up a conversation. Comment on how beautiful their things are. Get off on the right foot and they will be more open to bargaining with you. 

Lesson Three: Know What You're Getting In To

Are you at a normal 'ol cleaning out the attic garage sale? A moving sale? A family run estate sale? An estate sale run by professionals? Each type of sale has different elements that need to be addressed. You can usually sniff out if people are eager to get rid of their stuff. If it's a family run estate sale, (my favorite kind of sale) you know they have already removed everything they want to keep and usually they are wanting to get rid of the rest. However, be advised of what I said above, this is usually a difficult thing to do and many of the items have sentimental value to the seller. It has been my experience that items in family run sales are generally less expensive than those at sales run by professionals. These professionals usually know more about the items, what they sell for, how much the item is worth etc. Remember, they are making a percentage of the profit so they are in it to get as much money as possible. I like to hit up these types of sales on the last day which is sometimes the 50% off day. If it is towards the end of the sale, they may be willing to go even lower than 50% off which is a great thing for you!


Lesson Four: Pile It Up

So once you have struck up a conversation or at least hopefully said hello, inquire about the price of a few items. Ask if they'll take X amount for a few things. Once you've gotten them down on a few things, start a pile. They get excited when they see you piling it up! Once you've got everything you want in a pile ask them what the price for the whole pile would be. Remember, you have already got individual discounts, when they discount your pile, it's like a double discount! I've got some very great deals with this strategy.

Don't forget the old saying and perhaps the most important in picking and buying in general. "It never hurts to ask!" If you don't ask, you surely won't get a discount and if you do... the worst they can say is no. So go for it! Assert yourself and give it a try. You never know the good deals you might get. 

Do you like to garage sale? What are some of the ways you get good prices?

Friday, August 19, 2011

Daily Dose of Inspiration


A smart, smart man that Mark Twain was. In fact, when I think back to 20 years ago to when I was nine, I am totally regretting some decisions I made to not live on the edge. :) ok, ok I'm kidding. But isn't this the truth?

Friday, August 12, 2011

QUIRKY: The light of my life...

I've been doing some lighting research the past few weeks. I'm not sure why. We are planning on buying a new home early next year and I sure as heck am not going to put forth the effort in my current home. Maybe I'm just getting excited about decorating my new home.

Anyway, there are so many different options out there! From DIY to retail stores to buying handmade, the options go on and on. The cool thing about lighting is, if you are drawing a blank on the direction you want to go with decorating a space (or maybe you just have too many directions you are going in) using your lighting as a starting point can really help you out with the rest of the room. Here are some great pieces I've found:


Love this shabby, hand painted chandelier! I can see some sort of shabby, romantic look for a space where this pretty thing could be displayed. 


This chandelier from DreamOn Lighting begs for a cool, contemporary or even industrial setting. I like the crisp, clean look it has, yet it's still a little quirky. 

For the DIY'er, this great conversation piece comes with handy instructions. 

Isn't this sooo cool. Somehow I think that trying to do something like this yourself may cause a little grief, but it's still worth a shot. Maybe I'll even try it!

Or how about some good ol'  fashioned vintage inspiration?

What an absolutely breathtaking piece! This would be great in a foyer with high ceilings. 

Don't have the time or money to invest in new lighting? Check out these great chandelier silhouettes from wallstikas! I love these...

I'm going to use the lighting as inspiration for at least one room once we move into our new home. What pieces do you use for inspiration when decorating?

Wednesday, August 3, 2011

Happy Anniversary! National Cash Register Restoration

My husband and I are celebrating our fourth wedding anniversary tomorrow. Yay! To celebrate, we bought a 1926 model 717 National Cash Register to restore. This baby is looking rough to say the least! 


This ugly duckling will be looking good as new in no time! At least that's the plan. We are still trying to figure out if we would rather restore it back to its original condition or turn it into something pretty and fun that would look great in a soda shop or ice cream parlor. Hmm... I'll post more as we go. Until then, enjoy this adorable pic of my son helping daddy tinker with it.


Sunday, April 17, 2011

Essential: Validating an Authentic Piece (or dismissing a FAKE!)

Hi everyone! I just scanned my last post and oh my goodness, March 30th? That's no good. I have however been hard at work on my Etsy shop. I would like to talk about a few goodies I found while treasure hunting this weekend. First of all, I just want to briefly mention this awesome cake pan I lucked into.


The beautiful booty kicking comic star in a cake! I was so happy to find her at the estate sale of a cake maker.

Yesterday, I wandered into an amazing antique shop. The old man running it had been running it for years and it was HUGE, rooms and rooms full of stuff. I asked him if he sold anything online and he said, "I won't sell anything to anyone that can't step into my shop and have a conversation with me. I'd rather keep it!" Fair enough... antique shop owner/borderline hoarder perhaps? Either way, he had some great items and he knew his stuff. His crystal, depression glass, etc. seemed to be priced accordingly, if not a little high on some things. I wandered into a back room that he called his "garage sale" room. No taxes and garage sale like items. I dug through them a little bit and stumbled across this beautiful pottery bowl.


I'm not a pottery expert or even a pottery collector. I just thought this was a cheap, cool looking bowl and the glaze (that you can't see very well in the photo) is a very pretty rainbow like glaze. When I got home and started doing some Google "research" I was surprised to find that Fulper Pottery is highly collectible and some of it sells for thousands, wow! Granted, from what I've seen it is the vases and pretty stuff that is more valuable. So I've got this awesome little pot, that through my research I've found it is identified as a Fire-proof Cookware casserole. 


I don't have the lid to mine (darn it!) Anyhow, I also discover through Internet searches that there are plenty of Fulper fakes out there. From what I have learned, I know that this particular Fulper piece has a raised Fulper incised racetrack mark, which is the marking used by the company from 1916-1922. So right now, I'm trying to figure out "Is it real?" "Is it fake?" "How do I find out? Has anyone else had this issue with any of their collectables?

If it does turn out to be a fake... I've still got Wonder Woman right?


Wednesday, March 30, 2011

Essential: Adding Your Etsy Shop to Your Blog

Since I'm an amazingly brave girl, I almost simultaneously opened my Etsy shop and started writing my blog, all while chasing around a 14 month old baby boy all day. I don't know what possessed me to do this, maybe the monotony of my every day life, maybe I'm just crazy! Regardless, I'm learning a little bit every single day which is good. Today I learned how to add my Etsy shop to my blog. Go me! I'm not the most technologically savvy gal so if I can do it, you can too!

First, you will want to log in to your Etsy account. Once you are in your shop, (private, not public) go to the navigation bar on the left side of the page, scroll your little peepers all the way down.... NOW STOP! Right there where it says 'Etsy Mini,' in the Promote section. From here you just follow the simple directions for building your own mini Etsy shop inside your blog. How cool! As a big believer in the "Less is More" motto, I chose the 2 column, 2 row option.


Make sure you have selected from all three sections at the top. You know you haven't done this if a preview doesn't appear below. Once your preview appears, copy the code that shows below the preview.

Now you are through with Etsy. Go to your blogger account and open up the dashboard. You are going to go to design, then you click on "add a gadget" in the "add a gadget" section on your layout where you will want your shop featured. Once you click here, a pop-up will appear asking you what kind of gadget you want to add. Scroll down to HTML/JavaScript. Click on it. In the title you can put something like "My Etsy Shop" or the name of your shop. The contents section is where you will paste your code. After you paste it in your done! Well, almost... make sure that you save changes in the design section or all your hard work will disappear.


Look at you! You now have your very own Etsy Mini on your blog. Enjoy and may the sales fairies sprinkle you with sales dust from your blog. 

Thursday, March 24, 2011

Essential: Estate Sale Fun

I stumbled on an a-ma-zing estate sale today. The kind of estate sale that makes "pickers" like me happy all day. The kind where you look at stuff and say, "This is AWESOME!" then you look at the price tag and feel a little guilty about the deal you're getting. I picked up all this loot today. I'm not even going to say how much I spent on it all because you would be entirely too jealous and would maybe even quit following me ;)


This stuff is so cool! I might sell some in my Etsy shop... or I might just keep it all. You can look for it in my shop if you want.

http://www.etsy.com/shop/quirkyessentials?page=1

These old soda bottles are so cool. I'm not sure what language they are in though. The Pepsi bottle says 1941 United Kingdom on it.


My favorite treasure though, are these matchboxes. They are so stinkin' cute. What a great decorating piece! I got the rockin' vintage ashtray there too.


I almost think I got too lucky with this one. I may not even go out in search of treasure tomorrow... for fear that the estate sale gods have already given me too much today!

Wednesday, March 16, 2011

Essential: Flower Mementos

Last August, for our third wedding anniversary, my sweet husband sent me roses, daisies and wrote me a song! He's so cool. Anyway, I have tried many times to save flowers, i.e. drying roses, etc. They always just look like dead flowers, they collect dust, and I end up throwing them away months or years later. This time I decided to press my daisies in a big, thick book. Well, they have been in that big, thick book for 7 months now. I decided it was high time that I do something with them!

A few days ago, I lucked into this amazing yard sale and was able to pick up seven or eight frames for under three bucks. This is the frame I decided to use for my project.


It was definitely old. The old, fragile paper that was in it was brown from age around the edges. The frame actually could have been been used as is, but for the project I wanted it for, it needed some drama. So I gave it a few coats of black spray paint.

Then I hopped on over to graphicsfairy.blogspot.com. I cannot say enough about her page. It's awesome, everything is beautiful and best of all... ALL THE IMAGES ARE FREE! The only bad thing is you might possibly get lost for hours on end scouring all the beautiful images.

For this project, I was in search of a music sheet. I wanted to use a music sheet to serve as a reminder that my husband wrote me a song when I got the daisies. I printed off the music sheet, cut it to size and added my daisies. . .


It was alright, but a little crooked. On top of that I just thought it was still kinda boring. So I added a little dimension with another music sheet.


Ahhh, perfect. I really like this and I think the sheet on top of sheet gives it a little dimension.

Finally some dried flowers I can keep forever!

Any suggestions on other ways to keep dried flowers pretty forever?

Tuesday, March 8, 2011

QUIRKY: Old Brass Tea Cart

Well, I know nothing about tea carts but when I saw this at a thrift store the other day, I just had to have it! I traded the lady that worked there for a few things that I had... but didn't want. So it worked out just perfect for me! Tip: Don't be afraid to try to barter at thrift and antique stores. It never hurts to ask and a lot of times it works!


Here's my cart. I will spend about a decade polishing it! I'll post when it's real perdy =)


Sunday, March 6, 2011

QUIRKY: New Dresser

While running around a few estate sales the other day, I came across this small dresser. It looked sad to me =( like it needed a new life. I couldn't think of any reason I particularly needed it at the time but it was so ridiculously cheap that I bought it anyway.


It had this yucky faux wood contact paper on the top. Why do people do this?? I will never understand! Sure the wood underneath it was a little rough, but so much better than this.


Anyway, I knew I didn't want to spend much money on this project, seeing as I had no idea what I even planned on doing with it. So I went to Home Depot and bought some paint. Tip: If you don't want to spend a lot for paint and don't have your heart set on an exact color, look in the returned paint section at Home Depot or Lowe's. You don't want to go with the super cheap stuff believe me. For this project I lucked into a gallon of Behr's Premium Plus paint in "Chameleon" for $5.00. These cans usually run around $30.oo per gallon. If possible, I prefer to use Behr's Ultra Premium Plus because it has a built in primer which saves you a step. In this case, I really liked the color and it was a good deal so I went for it.

After getting home and removing the ugly contact paper and equally ugly hardware I then lightly sanded it. Since I didn't get the Ultra Premium paint, I went ahead and sprayed the whole thing with Kilz Primer. If you ever take on a project like this you will want to prime it to save future headaches and make your piece look great.


I decided to distress the dresser just a little bit. If you plan on distressing, apply a paste wax over the primer or if you are distressing more than just a little bit, you will want to use a contrasting color for the bottom layer. Wait 24 hours after painting and apply the paste wax just over the areas that you plan to distress. You only need to wait about an hour after applying the paste wax to paint your first coat of the outer layer. Wait at least 18 hours, paint your last coat and waa laa! After your last coat has dried, you can then distress. Since I only wanted to distress just a bit at the tops and bottoms of the drawers I used a fine 220 grit sandpaper and lightly sanded those areas. If you want a heavier distress, use several different grits.

Lastly, I screwed in the new hardware I bought on sale for a buck a knob at Hobby Lobby and was done. Of course it was so cute I found a spot for it =)


Tuesday, March 1, 2011

ESSENTIAL: Amazing First Birthday Party!


This January 26th marked a very special birthday for my baby boy Silas... his first! His stepsister Ella's 6th birthday is on January 24th. Naturally, we wanted to have a big party for the both of them. My job was to create a girl and boy themed party fit for a 6 and 1 year old.

This was no easy feat, but once I decided on a general theme everything just worked out. I knew something that they both loved and could agree on was Elmo! This guy for some reason has the ability to put a trance on small children! I also decided to throw cookie monster in there for good measure.


Now I know these cupcakes aren't "cupcake shop" quality but they're cute, and the best part is that Ella and her brother Dakota helped me to make them which made them feel good! Elmo was made of vanilla cake and white frosting with red food coloring. His eyes are a small, white marshmallow cut in half with a mini chocolate chip for the blacks of the eye. Finally, the finishing touch is a orange, tangerine flavored Jelly Belly Jelly Bean for the nose. Cookie Monster was made with a german chocolate cake mix and a homemade coconut topping with blue food coloring added. His eyes were made the same as Elmo's and he had Mini Chips Ahoy Cookies shoved in his mouth. Both cupcakes were a hit with adults and kids alike!

I wanted to do a party favor that kids and adults would be happy to take home. I did a variation of something I saw Martha Stewart do on "The View" for Whoopi's birthday. First, I took pretty scrapbooking paper and glued two to each other, print side out. Then I used the Martha Stewart Circle Cutter to cut out circles in the paper that were 5 inches in diameter. Now you could probably use a cup or something just as easily to cut out your circles. I just happened to have a coupon for 40% off at Michael's. Next, I printed out photos of  the birthday boy and girl from the past year. I used photos of the kids pictured with the other kids and adults that would be at the party. I then cut the pictures into circles with a 3 inch diameter. I wanted some way for the guests to remember what the occasion was and what year, so I used Avery address labels and added the date and occasion to the labels. It still didn't quite seem "finished" to me. I was planning on using the circles to attach to helium balloons that would float so it only seemed appropriate to find some sort of balloon quote. After a quick Google search, I found the perfect quote.


"No one can be uncheered with a balloon."
                                         - Winnie the Pooh


I then printed off the labels, stuck them on one side of the balloon and the picture on the other. I laminated the pieces, punched out a hole for the balloon string and the project was complete!

Everyone had a blast searching for their balloon with a photo of them with the birthday boy or girl.


Tip... when doing this project if you are worried about finding pictures of everyone, search Facebook! If you don't have a picture, maybe they will. You can then save it to your computer and print it out.