Showing posts with label DIY. Show all posts

Wednesday, September 14, 2011

QUIRKY: Upcycled Milk Crate Project

Browsing a recent estate sale, I stumbled on three vintage milk crates. Not the old, industrial, perfect for home decor awesome kind like this one from hilltopcottage.


No, these crates were straight up ugly... and I had to have them! Two dollars for all three? Sold to the sucker in the corner! But I had BIG plans for these uggos. The first thing I had to do was wash them off. Years of dirt, grime and spiders from the garage had taken a toll on these crates. So I gathered up my 19 month old partner and told him to get to work spraying (his favorite activity) those crates!


After removing the dirt and spider eggs, yes spider eggs... eew

I then spent about another hour with a bottle of 409 and some Q-Tips cleaning out the crevices wondering what the heck I had been thinking? If you want to get into some kind of similar project, you can just get the little cheapo crates from Wal-Mart or where ever. However, personally I like to upcycle and whenever possible I like to avoid giving my money to Wal-Mart. Besides, you can't get the crates that will allow you to chalkboard the middle unless you use the real, vintage deal. 

After all my scrubbing and cleaning, I then taped around the middle box on all the crates, where the company logo was. This is the section of the box you will use the chalk board spray paint. Chalk board spray paint is the coolest. I want to chalk board everything with it! BUT Since I don't want to be referred to as "Crazy Chalk Board Lady" I try to refrain and use chalk board spray paint sparingly. 

After two coats of chalk spray paint and a passing inspection from my beagle Bam, I then waited 24 hours to let the chalk board paint dry (after all you don't want the fresh coats to chip) then taped up that part and went to work painting the rest of the crates. I went with three different colors. All Krylon satin colors: Periwinkle, Jade, and Pistachio. Each crate took an entire can of the selected color and if I had really wanted to be a perfectionist about it, I could have used more than an entire can. I just skipped painting the underside of each crate. After letting the new paint day, they were ready for stacking. 


Baby boy is so proud


A quirky stack

The best part is the erasable chalk board paint in the middle, great for labeling. I have a simple 1, 2, 3. I'll probably end up with them in the kids playroom marked something like "legos' "markers" and such. 

Overall, I'm pretty happy with this project. They look great and it's something me and my little guy did together!

How about you? Any other upcyclers out there?

Saturday, August 27, 2011

From Dull to Shabtabulous...

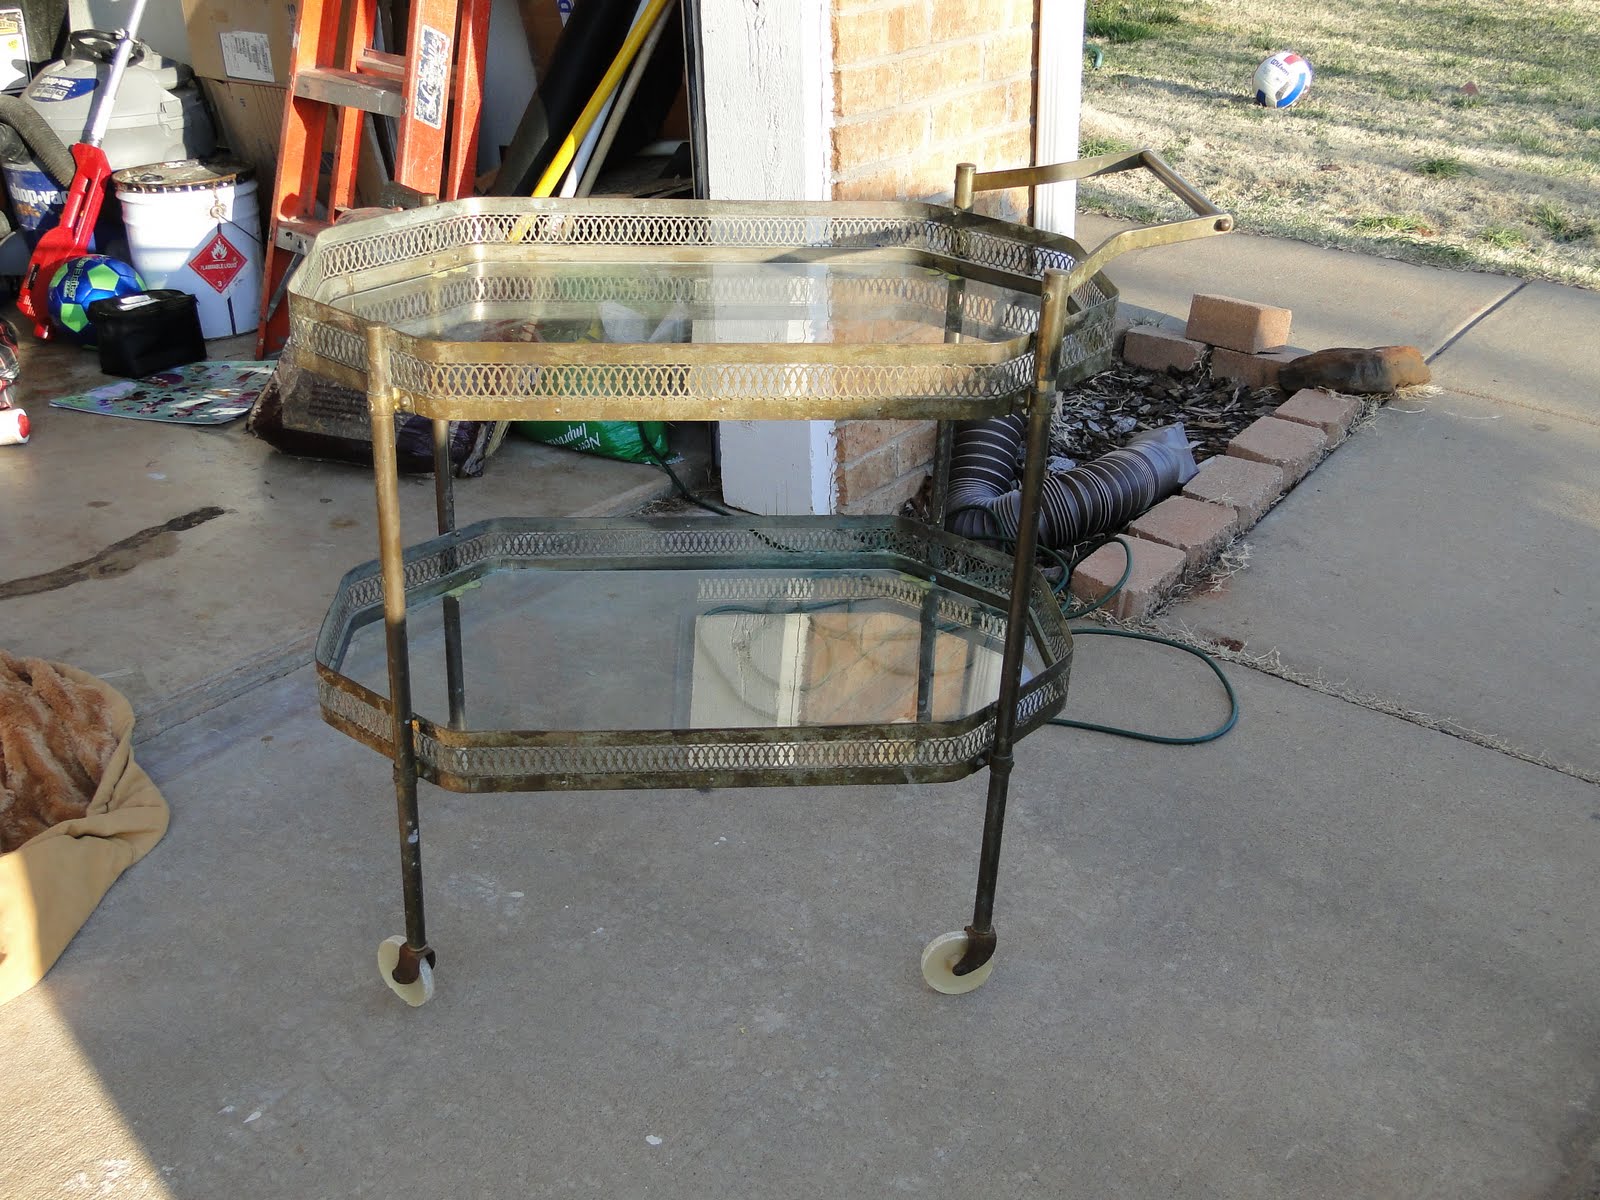
Awhile back I wrote a post about some recent finds. One of them was a great little vintage tea cart.
Quirky: Old Brass Tea Cart


I fell in love with the character of it. The white plastic wheels that keep on rolling, even with the chips and dents from age, the brass that was begging to be polished to a like-new state again, even the old lime green gooey substance that was used to mount the glass to the cart. 

A few trades later with the thrift store owner, I was loading this beauty up into the back of my SUV with visions of grandeur!

The first week home I did a little bit, cleaned the glass, scraped the goop, even polished a little. A very little. I'm talking maybe a 2" to 3" spot on the top railing. How long did this small feat take me? Oh somewhere in the vicinity of 30 minutes or so. 

My visions of grandeur were slowly fading as life got in the way. My little cart made its way into my room where it became a haven for toddler socks, my blow dryer and a few hastily arranged family photos. 

After months of this, I decided it was time to make my little cart fabulous, even if it wasn't the way I had once envisioned. I decided to (gasp!) paint it. For some reason, painting vintage items has a certain stigma to it for me. I know many people frown on painting a beautiful vintage wood piece, but this is brass right? The same metal that has to be polished and polished and then polished again!

So after a brief discussion in my brain, I decided to go for it. I had the perfect color in mind. I drove to Wal-Mart, picked out two cans of Krylon's "Pistachio" Spray Paint and went to town! After taping up the wheels and adding a coat of primer, I then added a few coats of the spray paint and wah lah, instant shabtabulousness!

Primed and ready to go


The finished product!


I sanded a little here and there for the shabby look

I love how the gold comes through all around the top 

I'm actually very pleased with the outcome. I figure I'll leave it this way for awhile and then maybe spray paint a few coats of another color over the Pistachio. Then I'll sand a little so the Pistachio shows through. Now, I just need to find an appropriate place to put it where it won't become a catch-all! Easier said than done :)
                                                  

Friday, August 12, 2011

QUIRKY: The light of my life...

I've been doing some lighting research the past few weeks. I'm not sure why. We are planning on buying a new home early next year and I sure as heck am not going to put forth the effort in my current home. Maybe I'm just getting excited about decorating my new home.

Anyway, there are so many different options out there! From DIY to retail stores to buying handmade, the options go on and on. The cool thing about lighting is, if you are drawing a blank on the direction you want to go with decorating a space (or maybe you just have too many directions you are going in) using your lighting as a starting point can really help you out with the rest of the room. Here are some great pieces I've found:


Love this shabby, hand painted chandelier! I can see some sort of shabby, romantic look for a space where this pretty thing could be displayed. 


This chandelier from DreamOn Lighting begs for a cool, contemporary or even industrial setting. I like the crisp, clean look it has, yet it's still a little quirky. 

For the DIY'er, this great conversation piece comes with handy instructions. 

Isn't this sooo cool. Somehow I think that trying to do something like this yourself may cause a little grief, but it's still worth a shot. Maybe I'll even try it!

Or how about some good ol'  fashioned vintage inspiration?

What an absolutely breathtaking piece! This would be great in a foyer with high ceilings. 

Don't have the time or money to invest in new lighting? Check out these great chandelier silhouettes from wallstikas! I love these...

I'm going to use the lighting as inspiration for at least one room once we move into our new home. What pieces do you use for inspiration when decorating?